Beginner


Professional
Notation
Drums and Percussion
Guitar
Choir
Keyboard
Soloist
| Instruction manual - Pizzicato 3.6.2 | EN470 - Revision of 2013/05/29 |
Beginner |
Professional |
Notation |
Drums and Percussion |
Guitar |
Choir |
Keyboard |
Soloist |
Page layout
Subjects covered:
Watch also the following video:
What is page layout? [Beginner] [Professional] [Notation] [Drums and Percussion] [Guitar] [Choir] [Keyboard] [Soloist]
Page layout is the art to arrange measures and staves on pages so as to print them.
Two working methods are available to encode the notes: the linear mode and the page layout mode.
Most examples seen until now were in page layout mode. The measures are represented as they will appear on the printed page. In some cases, working in linear mode is more convenient. If you prepare for example a large orchestral score which and you don't know yet the final aspect of page layout, we advise you to start with one of the linear models and build your score progressively. The whole score behaves as a large roller where measures scroll thanks to the horizontal scroll bar. Similarly, when you create an arrangement only to hear it and not to print it, it is useless to work in page layout view.
When you need to print the score, this linear mode is no more appropriate, because it is then necessary to take the paper format into account. The operation which consists in laying out measures and staves to adapt them to the paper format is called page layout. The constraint introduced in page layout is that Pizzicato must calculate the page layout each time you modify a measures width or you erase or add measures or staves. For a complex score, it is better to work in linear mode and to make the page layout when the score structure is finished.
Page setup structure in Pizzicato [Beginner] [Professional] [Notation] [Drums and Percussion] [Guitar] [Choir] [Keyboard] [Soloist]
In Pizzicato, the page layout is done with pages and areas.
A page corresponds to a sheet of paper. Its size is the size of the paper you put into your printer.
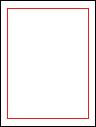
In most cases, a page has printer margins that limit printing close to the borders. These margins are defined by your printer and cannot be changed. Most printers have a limitation to how close it can print to the borders of the sheet of paper. Some inkjet printers may have zero margins and in that case you can print everywhere on the page. We can represent this as follows:
The sheet borders are shown in black and the printer margins are displayed in red. The area between the black and red rectangle cannot be printed.
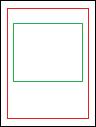
In Pizzicato, an area (or printing area) is a precise zone inside a page, in which Pizzicato can print music systems. Here is an example, showing an area defined in green inside the page:
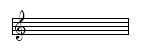
A system is a set of one or more measures from left to right, on one or more staves playing together. They form a graphic unit on an area.
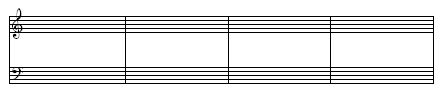
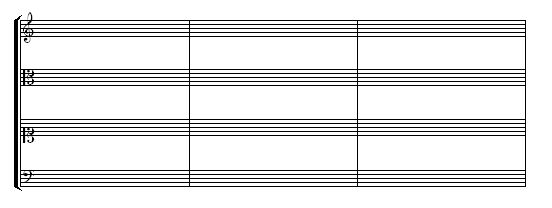
Here are three systems (1 measure of 1 staff , 4 measures of 2 staves and 3 measures of 4 staves):
One area can include zero, one or more systems.
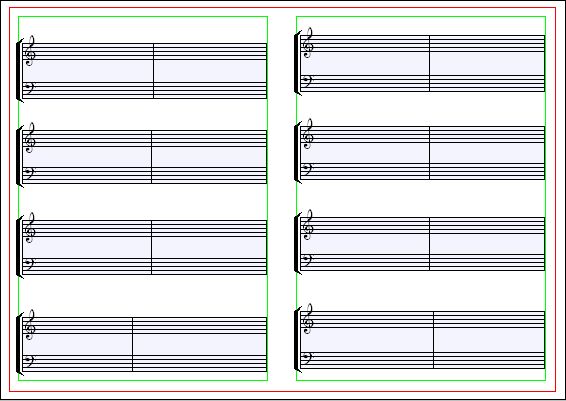
Here is one page, with two printing areas. Each one has four systems and everything is printed on one sheet of paper.
Page layout dialog box [Beginner] [Professional] [Notation] [Drums and Percussion] [Guitar] [Choir] [Keyboard] [Soloist]
We will see an example of score creation in linear mode and then how to do the page layout.
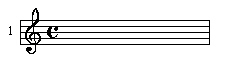
- In the document manager, click on the My scores folder with the right mouse button and select New document... and set its name to Page setup test. It shows up in the My scores folder. Open it with a click on the "+" icon in front of it. Double click on the score name Score 1. The score appears as follows:
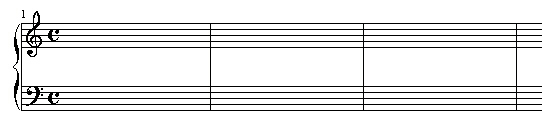
- Add 39 measures and one staff with the measures and staves tool. Place a bass clef on the second staff and decrease the distance between the two staves. Erase the names of the staves in the instruments view and add a piano brace to connect both staves. On the upper staff, add the measure numbers for each system. You should get:
- Use now the shortcut allowing to go from the linear mode to the page layout mode and vice versa: it is the upper case letter "P". It is the same action as modifying the popup menu located at the top of the score view (
). As the page layout calculation was not yet done in this score, Pizzicato shows you the page layout dialog box:
This dialog may also be called from the File menu, Page setup item.
- As it is the first page layout, Pizzicato adapted the parameters of this dialog box to your default printer. You can also reach these parameters using the Printer Setup... button. A dialog box appears. It is different for each printer model. Usually, you can select the paper size (A4 format for example) as well as the paper orientation (portrait mode or landscape mode). When you click Apply then Cancel (or simply Print as the score will not be done at this point), you go back to the page layout dialog box and the paper dimensions as well as the external margins are adapted to the printer.
Here is a description of the main elements of this dialog.
- In the Printer setup and zoom frame, except for Pizzicato Beginner, you can specify a printing zoom in percents, so that you can place more measures and staves on a page. By choosing a value lower than 100, the page on screen will look bigger, but will be reduced accordingly when printed. In Pizzicato Beginner, only two values may be used: 100 % or 85 %.
- The Margins frame displays the printing margins. You can modify them if you want to. By clicking on the Minimal margins button, the values are reset to the default printer margins.
The frame entitled Printing areas is used to define one or more printing areas on the page, where Pizzicato can place music systems. Here is the detail:
- The first two menus specify the number of printing areas vertically and horizontally. In a standard page layout, they are set to 1. To create a booklet, for instance in A4 format, folded, you can select the landscape paper orientation and define two areas horizontally, so as to divide the paper in two areas.
- The two spacings (in mm) are used to separate two consecutive areas, vertically or horizontally.
- The internal margins define a border inside the printing area where Pizzicato will not place any system.
- When the Display borders check box is active, Pizzicato will draw the printing areas borders with a thin gray line so you can better see the structure of the page, for instance when you work on a complex page layout.
- The next text box is used if you want to exclude one or more printing areas from measures and systems. You can fill it with a series of area numbers, separated by commas. If you do not want areas 1 and 3 to display any system, fill it with "1,3". You can use this to have a blank or title page with no music on it, or to insert pages with only text and no music.
- The Page order frame specifies how to print the areas on the pages. By default, Standard means that the order will be 1, 2, 3, 4, ... The Booklet mode can be used to print two areas per page, both sides and folded so that you have a booklet. The page order will be 4, 1, 2 and 3. Pizzicato automatically computes this. For any other case, you may use the customized mode, where you can define the page order with a series of numbers separated by commas in the corresponding text box.
The frame entitled Actions is used to specify the following parameters:
- The Apply the printer setup and the areas check box specifies that Pizzicato must create the areas and pages. If you disable it, the present page structure will not be modified.
- The next text box specifies the first page on which the modifications will be applied. Previous pages will not be modified.
- The checkbox entitled Do not move text blocks will keep the text blocks as they are. The new page layout will not affect the position of the text blocs associated to the pages.
- The checkbox entitled Do not change the number of measures per system is used to keep the numbers of measures per system as they are., despite a new page layout. If you have customized these numbers individualy for each system, this option helps you to keep this customization even when you recompute a new page layout.
- The checkbox entitled Reset the distances between staves to their default values will reset the distances that separate each staff from the other to their default values, which is the distances that are displayed in the linear mode (Linear/Page/Global menu). By default, it is not checked, which means that if you customized these distances, they will stay in the new page layout. If you want to reset them, check this box.
The left frame specifies various options regarding the way Pizzicato will assemble systems and place them in the printing areas. Here is the detail.
- Set the number of measures per system to : when checked, the corresponding text box determines the number of measures in a system. If disabled, Pizzicato will estimate this number automatically, according to the width of the measures.
- Set the number of systems per page to : when checked, the corresponding text box limits the number of systems per page.
- In Pizzicato Professional and Notation, you can check the Optimize systems box. Pizzicato hides from the page layout all staves which do not contain any note or major indication. It is used for orchestral scores, where it frequently happens that instruments do not play anything during several measures. The staves are not drawn and it saves paper in the orchestral score.
- The next text box specifies the distance between two consecutive systems. A value of 8 is usually appropriate.
- The next check box, if checked, forces Pizzicato to adjust staves horizontally on the area margins, particularly when you adjust the size of measures or move systems around.
- If you check the Distribute systems on the page box, Pizzicato will distribute systems in a balanced way on the page. This option has priority over the intersystem distance defined above.
- A text box reserves some space (in mm) for the first page title. A value of 20 mm is usually appropriate.
- The next two numbers are defined in %. When Pizzicato computes the width of systems according to the widths of measures, it must often reduce or enlarge individual measures to make them fit with the page and area margins. These two numbers specify the limit of how much Pizzicato can reduce and enlarge the measures. If you want a tight page layout, you can decrease them. If you prefer a page layout with more space, increase them.
The Background frame is used to determine the background of pages on the screen. You can have a white background (No background), a colored background (click on the color box beside it to select a color) or a bitmap pattern (24 bits BMP image). You can find a paper bitmap pattern in the following folder: Programs / Pizzicato 3.x / Data / Bitmaps / Texture-2.bmp or Texture-3.bmp. On Mac, you find it in Applications / Pizzicato 3.x / Data / Bitmaps. It only affects the screen display.
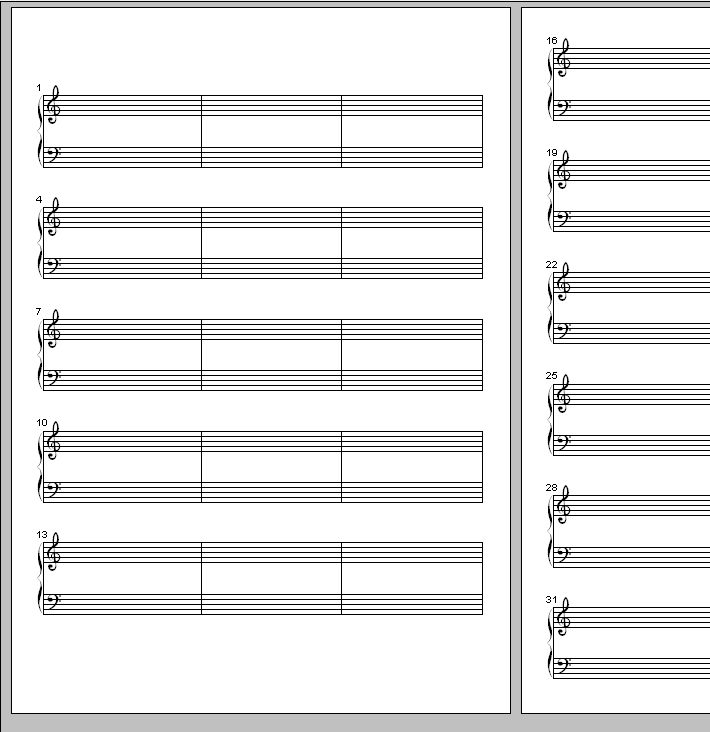
Two buttons may be used to validate this dialog. The first one is Compute and OK and Pizzicato will save the parameters and apply them for a new page setup. The other choice is OK - No compute and only saves the parameters without applying the parameters to a new page setup. Click Compute and OK. The score appears in page layout mode and displays the way in which Pizzicato laid out the measures and staves:
According to your printer, it may be slightly different.
On the main palette, activate the
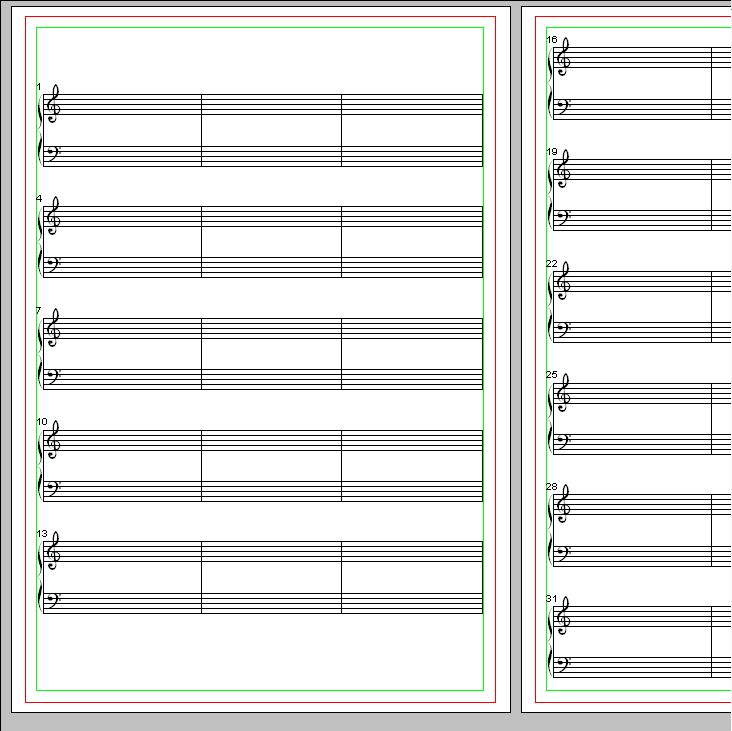
tool. It is the reference marks tool. Its shortcut is the key with two superimposed dots ":". When it is active, margins are visible. To disable it, click it again. The complete page is presented as follows:
The white background represents the paper physical dimensions. A red rectangle shows the printer margins. It delimits the paper area where your printer is able to print. Outside this red rectangle, nothing will be printed, even if by error you place text areas or symbols. The maximum size of this red rectangle is specific for each printer.
A green rectangle is located inside the red rectangle. It shows the margins defined for the printing area. It is inside this green rectangle that Pizzicato places measures and staves.
The measures are laid out starting at the top of the first area. When Pizzicato cannot add measures to the right, it continues below, going back to the left border of the area, as you do when writing text.
Page contextual menu [Beginner] [Professional] [Notation] [Drums and Percussion] [Guitar] [Choir] [Keyboard] [Soloist]
When you click with the right mouse button in the background of a page, a contextual menu is displayed.
The first item is Display and it has 6 subitems to select the way you want to display pages:
- One page - Display only one page at a time. You can use the page scroll at the left bottom of the window to move from one page to the other.
- All pages horizontally - Pizzicato displays all pages side by side. You can scroll with the page scroll or with the horizontal scroll. You can also click in the background and move the score around. This is the default display mode.
- All pages vertically - Pizzicato displays all pages in a vertical row. You can scroll with the page scroll or with the vertical scroll.
- One area - In this case and the two next cases, Pizzicato only displays areas. Usually, there is one area per page and the area is a bit smaller than the page, as it does not have the printing margins. When you have a page layout with more than one area per page, this display mode shows you only the individual areas.
- All areas horizontally - All areas are displayed, side by side.
- All areas vertically - All areas are displayed, on a vertical row.
The next menu item is Insert. According to the Pizzicato version, it displays one or more items:
- A text block... - Adds a text block in the area where you clicked. See the lesson about text blocks.
- An image... - You can choose an image file, that presently must be a 24 bit BMP image file. When the image appears on the page, you can move it, resize it by its bottom right corner (if you hold the CTRL key, it resizes proportionally). You can double click it to change its size or the image file. You can delete it with the delete or backspace key when the mouse is over it.
- A graphic... - Pizzicato opens a graphic editor where you can create simple graphic objects to display in the score. See the graphic editor lesson. When the graphic appears on the page, you can move it, resize it by its bottom right corner (if you hold the CTRL key, it resizes proportionally). You can double click it to change its size or the edit the graphic. You can delete it with the delete or backspace key when the mouse is over it.
The next items are related to the pages:
- Insert a page before this page - will add a new page just before the current page (the page you are clicking on).
- Add a page after this page - will add a new page just after the current page.
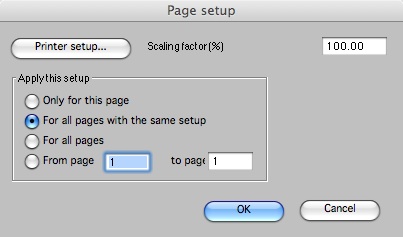
- Printer setup for this page - calls the following dialog:
This dialog is used when you want some pages to have a different layout than other pages. You can select a printer setup (it can even be another printer, for instance if you want a cover sheet in color on a color printer and the other pages on a black and white printer), another print scaling factor and apply it to one or several pages.
- Delete this page - will simply remove the current page.
The next items are related to the printing areas:
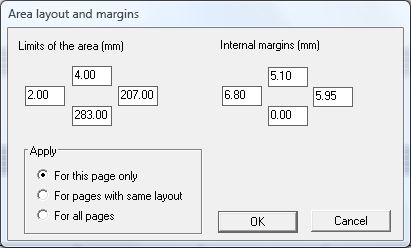
- Format of this area - If you click inside an area, this item calls the following dialog:
You can modify the size and position of that area inside the page and you can adjust the internal margins. You can apply these changes to this page, all similar pages or all pages.
- Delete this area... - will remove that area from the page.
- Add an area - If you click outside of an area, but inside a page, you can add a new area, if there is enough space left free on that page. This menu is used mainly to construct a page freely.
The last menu item is Page layout... and it simply calls the general page setup dialog that we explained above.
Modifying the layout of measures and systems [Beginner] [Professional] [Notation] [Drums and Percussion] [Guitar] [Choir] [Keyboard] [Soloist]
The calculation done by Pizzicato does not always correspond to the way you want to lay out the measures on the pages. The number of measures per system, the number of systems per page and the spacing of systems on the page can be modified thanks to the measure layout tool. Similarly, when you work with templates with a prepared page layout, it can be useful to modify the layout of measures and staves.
- Use the 67 or 50% zoom value in order to see the full page.
- The measures layout tool
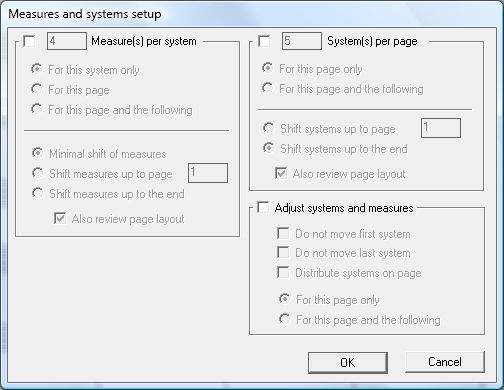
is located in the main palette. Its shortcut is the upper case letter "D", which acts directly on a measure without selecting the tool on the palette. Place the mouse cursor on the first measure of the first system of page 1 and type "D" with the keyboard. The following dialog box appears:
You may also reach this dialog by clicking on a measure (without an active selection in the score) with the right mouse button (option click on Mac). A contextual menu appears and contains an item Measures and systems setup... which calls this dialog.
Three types of operations can be executed with this dialog box, simultaneously or not.
- The first consists of adapting the number of measures contained in a system. To activate it, check the box located in front of the Measure(s) per system text label and fill in the number of measures you want in a system. Just below it, a multiple choice determines if you want to modify this system only, the systems of this page or all following systems.
Another set of choices specifies how Pizzicato will shift existing measures. This is used to limit the impact on an existing page layout. A check box is used to recompute the page layout for these pages automatically.
- The next possible operation, located in front of the System(s) per page text label, makes it possible to select the number of systems on a page. You can also specify if it is for the current page or for all following pages.
Another set of choices specifies how Pizzicato will shift existing systems. This is used to limit the impact on an existing page layout. A check box is used to recompute the page layout for these pages automatically.
- The third choice, Adjust systems and measures, is an operation which will smooth out the layout of systems and measures on the current page and possibly the following ones.
We will examine an example for each of the three operations.
- Check the first box, in front of Measure(s) per system. A text box lets you specify the number of measures per system. When calling the dialog, it displays the number of measures contained in the system from where you called this dialog box. Change this number. Just below, keep the default choice, For this system only. Click OK. The score displays the number of measures on that system. Other measures have been shifted accordingly.
- Call again the measure layout tool on the first staff, first measure. Select the System(s) per page operation. Change this number. The multiple choice located below specifies the scope of this operation. Keep the For this page only choice. Click OK. You will notice that the systems have been adapted.
- Call again the measure layout tool on the first staff, first measure. Select the Adjust systems and measures operation. The first two boxes prevent Pizzicato from moving the first and/or the last system. If these boxes are not checked, Pizzicato readjusts these systems before aligning the others. It is useful when you place a title and you move the first system down to add space for it. You can then prevent Pizzicato from changing the position of the first system, while adjusting the others. Now check the For this page and the following option. Check the Distribute systems on page box. It equalizes the systems in the page. Click OK. Observe the systems of the first page. They are placed at equal distances on the page.
You can of course adjust measures and systems manually with the measures and staves tool, as previously considered. But the horizontal modifications of the systems are cancelled if the automatic horizontal adjustment of systems option is checked in the page layout dialog box. If you need a free page layout, disable that option.
Since version 3.6, when you display the marks and margins, you will notice the presence of "+" and "-" blue buttons right to each system, as well as in the bottom of the page. The first may be used to add or remove one measure in the system (the others are shifted accordingly). The buttons below may be used to add or remove one system in the page (the other system are shifted accordingly). These shortcuts are useful to adjust the page layout visually and avoid to open and set parameters in the above dialog box.
One more word of caution. The above dialog moves and rearrange existing measures and staves. It will not create new ones. To create new ones, use the measure and staves tool.
Printing the score [Beginner] [Professional] [Notation] [Drums and Percussion] [Guitar] [Choir] [Keyboard] [Soloist]
After the first page layout is done, you can always calculate the page layout again by changing the values.
To print a score, select the Print item in the File menu. A printer dialog box appears. It is different for each printer model. Most printer lets you select the number of copies and the pages to be printed (All or From page… to ...). Some models also propose a choice of printing quality. In a general way, select a normal quality. If you find that the ties and the notes look irregular, increase the printing quality or the resolution (if your printer allows this). Click OK and the score will be printed.
Show or hide the staves of a system [Professional] [Notation]
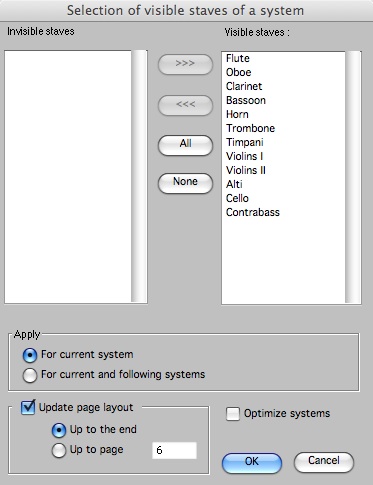
In page mode, when you click on a measure with the right mouse button (without any selected measure in the score), a contextual menu presents an item named Visible staves... which calls the following dialog:
The example displayed here is an orchestral score (you may open it through the menu File, Open a template..., Orchestra, Symphony number 2 - Beethoven - 1 page).
This dialog is used to individually determine for each system which staves are visible in a conductor score. We explained the page setup option handling this automatically according to the presence of notes or symbols in the measures. The above dialog provides a direct manual control on this. Here is how to use it:
- The list to the right contains all visible staves in the system and the list to the left contains the staves that are hidden (none here).
- To hide a staff, double-click the corresponding line in the right list and it moves to the left. You may also use the "<<<" button which moves a line from left to right.
- To display a hidden staff, double-click the corresponding line in the left list and it moves to the right. You may also use the ">>>" button which moves a line from right to left.
- The buttons named All and None respectively moves all staves to the right and to the left. Warning: to validate with OK, there must be at least one visible staff in the system.
- The modifications done may be applied to the current system (that is, the system that contains the measure on which you clicked to call the dialog) or also to the following systems.
- The Optimize systems check box asks Pizzicato to calculate which staff to display according to the contents of the staves.
- The last frame forces Pizzicato to reorganize pages according to the modifications of the systems. Pizzicato may or may not compute the pages up to the end or up to a specific page.
You may then click on OK to apply the modification to the score.
Beginner |
Professional |
Notation |
Drums and Percussion |
Guitar |
Choir |
Keyboard |
Soloist |