Light


Beginner
Professional
Notation
Composition Light
Composition Pro
Drums and Percussion
Guitar
Choir
Keyboard
Soloist
| Instruction manual - Pizzicato 3.6.2 | EN565 - Revision of 2013/05/29 |
Light |
Beginner |
Professional |
Notation |
Composition Light |
Composition Pro |
Drums and Percussion |
Guitar |
Choir |
Keyboard |
Soloist |
Contextual menus and MIDI data modification
Subjects covered:
Watch also the following video:
Contextual menu of a note [Light] [Beginner] [Professional] [Notation] [Composition Light] [Composition Pro] [Drums and Percussion] [Guitar] [Choir] [Keyboard] [Soloist]
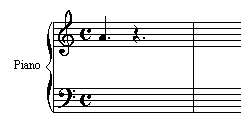
By clicking on a note (or a rest) with the mouse right button (Alt-click on Mac), a popup menu gives access to various operations to do with that note. Open the Ex077 document:
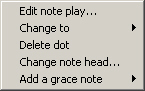
With the mouse right button, click on the dotted quarter note . The following menu appears:
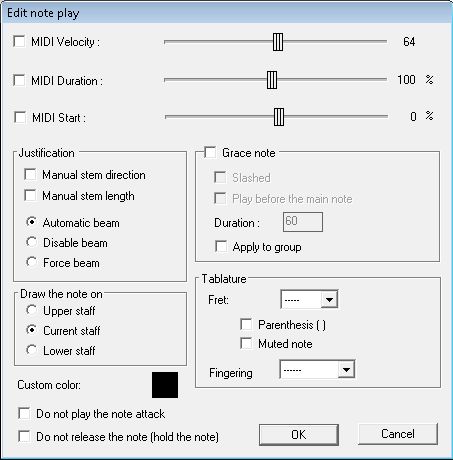
- The Edit note play… item brings the following dialog box:
The first three boxes are activated only when the note was played on the MIDI keyboard, i.e. when it was recorded in real time or when it comes from the transcription of a MIDI file. This dialog box lets you modify the playing parameters. When a note is introduced with the mouse, the three boxes are disabled. In such a case, Pizzicato considers that the velocity of the note is specified in the instrument view or possibly modified by symbols. It is similar for the MIDI duration and start. This dialog box lets you modify or remove information of velocity, duration and start associated with this specific note.
Velocity is expressed between 1 and 127 and corresponds to a complete scale of available nuances in a synthesizer.
MIDI duration is expressed as a percentage of the graphic value. A quarter note with a 100 % value will thus be played as a quarter note. Quarter note with a 50 % value will be played with the duration of an eighth note.
MIDI start is also expressed as a percentage and specifies an advance or a delay, by a value proportional to its duration.
If the score was recorded in real time or comes from a MIDI file, you can thus modify a specific note to give it a force (velocity), a duration or a different MIDI start.
If the score was encoded with the mouse, modifying the parameters of a note will personalize the performance. You may then amplify a specific note, lengthen a duration or shift a start back… It gives you a better control on how the score is played.
The Justification frame influences the way in which automatic justification acts on the note. By default, this is managed by the tools of Pizzicato, but this dialog box lets you visualize these adjustments.
When the Manual stem direction box is checked, it means that you have used the stem direction tool on this note. From there on, Pizzicato remembers the state of the stem with the note. When Pizzicato justifies the measures, it remembers it and takes it into account. If you disable this box for a note, the stem will again be automatically managed by Pizzicato at the next justification, because the manual modification will have been forgotten.
The Manual stem length acts in the same way, but for the length of the stem and the angle of the beams.
The same principle applies for the way in which Pizzicato connects beams for several notes. When a note is introduced, the choice by default is Automatic beam. When you modify beams manually, this change is memorized so that Pizzicato can take it into account at the next measure justification.
The Draw the note on frame is only present in advanced versions of Pizzicato and may be used to change the staff on which the note is drawn with the purpose to realize cross-staff beaming. See the lesson on cross staff beaming.
The Grace note frame is also only present in advanced versions of Pizzicato. It is used to manage grace notes. See the lesson on grace notes.
The Tablature frame is related to the guitar tools. Se the lesson on the guitar tools.
The Custom color box is used to specify the color used to display the note and its stem.
The Do not play the note attack check box removes the MIDI message sent to the sound card to start the note. It is useful for instance in the case of a repeat when a note is hold across the repeat bar. At the second passage, the note is already playing, so the note should not be started again but should be stopped at its end (otherwise the note will play forever).
The Do not release the note (hold the note) check box keeps the note playing until the end of the score. The MIDI message to stop the note is not sent. You may use this for special effects or to send a MIDI Note ON message without a MIDI Note OFF.
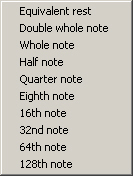
- The Change to... item introduces a second menu:
By selecting one of the suggested values, you can thus change a note into a rest or vice versa, and also modify the note or rest value. To get the same result, you could erase the note and add another note value.
- For the notes or rests with one or more dots, the Delete dot item lets you easily remove a dot.
- The Change note head... item is present only in advanced versions of Pizzicato and is used to change the note head symbol (triangle, square, cross,...)
- The Add a grace note... item is present only in advanced versions of Pizzicato and lets you add grace notes to a main note. See the lesson on grace notes.
Contextual menu of a measures selection [Light] [Beginner] [Professional] [Notation] [Composition Light] [Composition Pro] [Drums and Percussion] [Guitar] [Choir] [Keyboard] [Soloist]
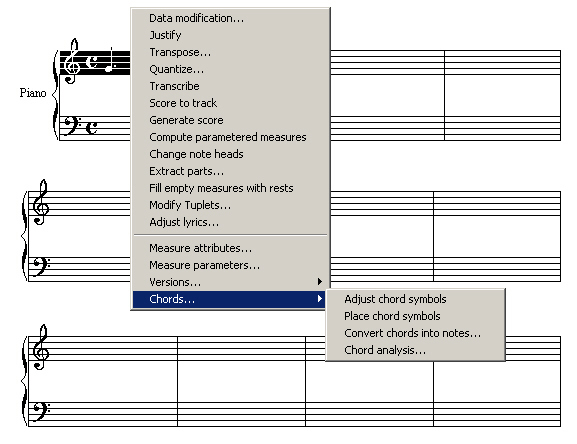
When one or more measures are selected, the Edit menu contains a series of choices to treat the selected measures. These choices are also available by clicking in the score with the mouse right button (Option-click on Mac). Select for example measure 1 and click with the right button. Take care not clicking on a note or a rest, in which case you get the note contextual dialog box. The contextual menu of measures appears:
The various items of this menu are explained separately in the various lessons of this manual. They are the same as their equivalents of the Edit menu.
Modification of MIDI data [Beginner] [Professional] [Notation] [Composition Pro] [Drums and Percussion] [Guitar] [Choir] [Keyboard] [Soloist]
Pizzicato lets you to add, remove or modify various MIDI information influencing the score performance. It gives you a better control on the performance of the score by a synthesizer. These MIDI data are stored either in each note separately or in the MIDI track associated with the staff.
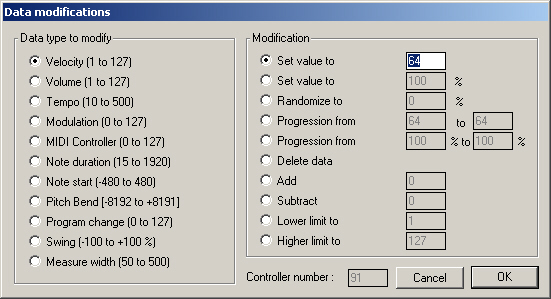
To reach these modifications, select one or more measures on one or more staves and then select the Data modification... item in the Edit menu (or using the contextual menu of measures). The data modification dialog box appears:
The left multiple choice specifies the type of data to modify and the right multiple choice specifies how the data will be modified. Let us first see the types of modifiable data:
- Velocity: the playing force of a note (equivalent of the hitting force on a piano)
- Volume: the general amplitude of notes
- Tempo: the performance speed of notes
- Modulation: an effect producing a vibration in notes
- MIDI controller: allows the activation of various effects according to the synthesizer you use. The number of the MIDI controller must be specified in the text box entitled Controller number.
- Note duration: determines the playing duration of notes compared to their graphic values
- Note start: determines the effective start of notes compared to their graphic values
- Pitch Bend: an effect which increases or decreases the pitch of notes by very small steps
- Program change: it is the number which determines the choice of the instrument played by the synthesizer
- Swing: an effect which moves the central reference of the measure beat forwards or backwards and especially used for jazz performance
- Measure width: this choice lets you determine the graphic width of the selected measures
Once the type of data has been specified, select the way to modify them:
- Set value to: set a constant value for the data
- Set value to (%): the existing data for the selected measures will simply be modified by the percentage
- Randomize to (%): the existing data are made random proportionally to the percentage
- Progression from / to: a data progression is created between the two values on the given measures
- Progression from / to (%): a data progression is created between the two values, but expressed as a percentage of the existing values
- Delete data: the possibly existing data are removed
- Add: Pizzicato adds a constant value to the existing data
- Subtract: Pizzicato subtracts a constant value from the existing data
- Lower limit to: Pizzicato increases the existing data so that they are higher or equal to this value. The data already higher or equal are not modified.
- Higher limit to: Pizzicato decreases the existing data so that they are lower or equal to this value. The data already lower or equal are not modified.
Most combinations are allowed between the types of data and the modifications. Some combinations are incompatible (for example, it is not possible to remove the width of a measure, it does not make sense because a measure must always have a graphic width).
By clicking OK, the selected measures are affected by the operation.
Light |
Beginner |
Professional |
Notation |
Composition Light |
Composition Pro |
Drums and Percussion |
Guitar |
Choir |
Keyboard |
Soloist |