Light


Beginner
Professional
Notation
Composition Light
Composition Pro
Drums and Percussion
Guitar
Choir
Keyboard
Soloist
| Instruction manual - Pizzicato 3.6.2 | EN320 - Revision of 2013/05/29 |
Light |
Beginner |
Professional |
Notation |
Composition Light |
Composition Pro |
Drums and Percussion |
Guitar |
Choir |
Keyboard |
Soloist |
Characteristics of staves
Subjects covered:
Watch also the following video:
Changing the staff names [Light] [Beginner] [Professional] [Notation] [Composition Light] [Composition Pro] [Drums and Percussion] [Guitar] [Choir] [Keyboard] [Soloist]
We will learn how to change the staff names and how to reach the staff characteristics dialog box.
When you create a new document and add staves to it, they are automatically named with the sequence number of the staff. The instrument view lets you modify this name.
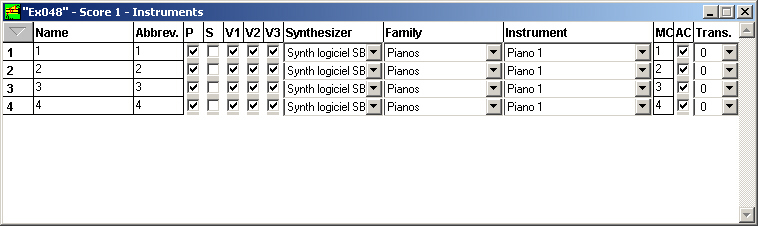
The first column indicates the sequence number of the staff. The two following columns are text boxes. By clicking inside it, the text cursor will be activated. You can then modify the contents of these text boxes. The main name (Name column) is the name displayed in the score view in front of the staves, in linear mode. In page view, only the first system of the first page displays the main name. The other systems will display the abbreviated name (Abbrev. column). The names of the sequencer view tracks are also the abbreviated names.
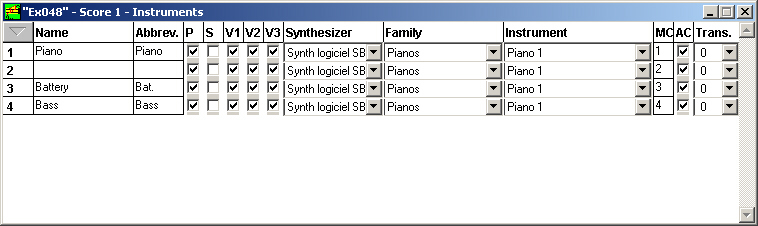
Notice that you can use the tabulator key to go from a text box to the next. By using the return key, the blinking text cursor disappears and complete the encoding of the instrument name.
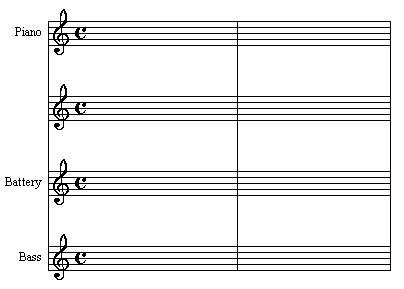
Note that the other names follow the horizontal movement. By default the names are automatically justified to the right for all staves. The vertical position can be adjusted individually.
Characteristics of staves [Light] [Beginner] [Professional] [Notation] [Composition Light] [Composition Pro] [Drums and Percussion] [Guitar] [Choir] [Keyboard] [Soloist]
With the measure tool or the arrow tool, a dialog box can be called to consult or modify various characteristics of the staves.
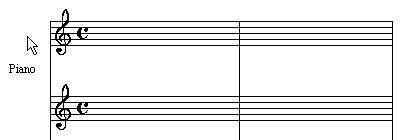
Place the arrow of the mouse cursor to the left of the first measure of the first staff, in the area in continuation with the lines of the staff:
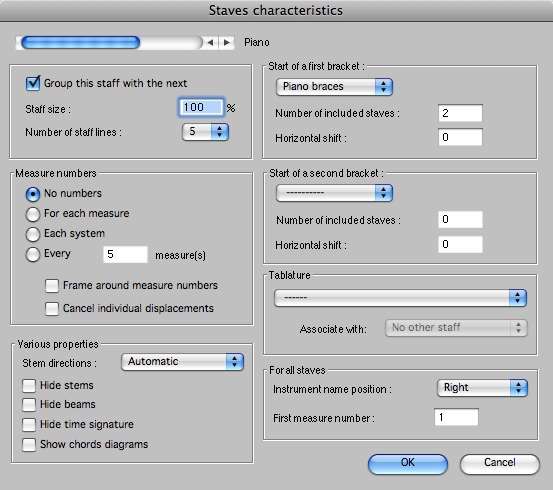
Double click. The staff characteristics dialog box appears:
This dialog box offers various options for each staff. In its upper part, an horizontal scroll bar selects the staff to modify. To its right, you can see the name of the staff of which the parameters are currently visible. As you called this dialog box from the first staff, this staff is selected by default.
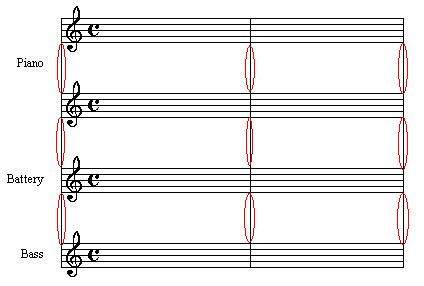
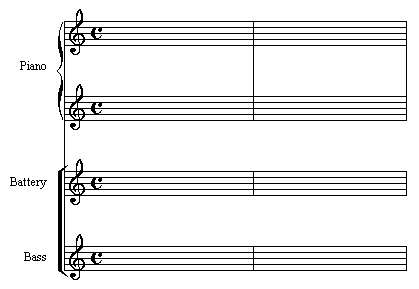
The first check box is labeled Group this staff with the next. As you may have noticed, when you add staves, Pizzicato connects them all by an extension of the bar lines:
The line connecting the first measure of a system is always visible. It shows that all connected staves belong to the same system and must be played all together.
On the other hand the lines which follow are not always drawn. They usually connect the groups of instruments in an orchestra score, such as for example all the brasses, the strings… In the case of a piano score written on two staves, the two staves are also connected. We will remove the bar lines connecting respectively staves 2 and 3, then 3 and 4.
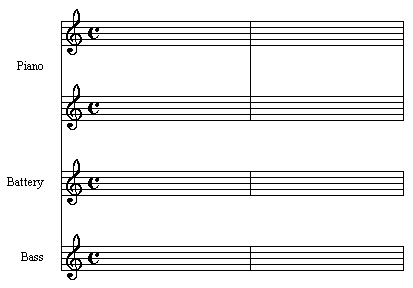
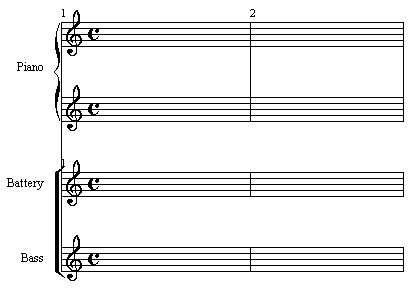
Click one time in the right arrow of the scroll bar to display the second staff (which does not have a name). Uncheck the Group this staff to the next option. Click once more to display the drums staff and uncheck it also. Click OK and you get the following:
The first bar line remains but the next ones disappeared for the required staves. Thanks to this option, you can organize the instrument groups as you want.
Braces and brackets [Light] [Beginner] [Professional] [Notation] [Composition Light] [Composition Pro] [Drums and Percussion] [Guitar] [Choir] [Keyboard] [Soloist]
It is common to connect with a brace (or a bracket) the staves played by the same instrument (here the 2 piano staves) or all instruments of an orchestra group. We will connect the 2 piano staves and then the drums and the bass (rhythm section).
Call the staff characteristics dialog box on the first staff. In the popup menu located under the text Start of a first bracket, select the "Piano braces" item. This indicates that this staff (the first) will be the beginning of a bracket. In the Number of included staves text box, fill in "2". The bracket will thus connect two staves starting from the first. The second text box shifts the bracket to the left and it is not necessary for the piano brace.
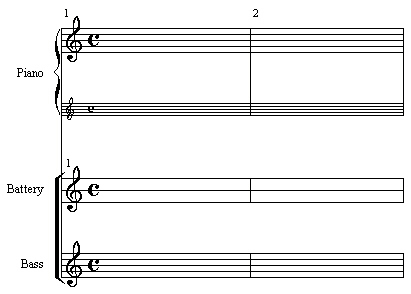
Now move the horizontal scroll bar to display the drum staff. Select the "Orchestral bracket", "2" staves included and an "Horizontal shift" of "3". Click OK. The score becomes :
In the above dialog, the section entitled Start of a second bracket, is used in a full orchestra score, so as to associate staves inside the same instruments section, for instance the French horns within the brass section.
Measure numbers [Light] [Beginner] [Professional] [Notation] [Composition Light] [Composition Pro] [Drums and Percussion] [Guitar] [Choir] [Keyboard] [Soloist]
It is possible to display measure numbers on one or more staves. Call once again the same dialog box. In the Measure numbers frame, for the first staff select the For each measure option. Go to the drum staff and select the Each system item in the same menu.
The option For each measure displays the measure numbers above each and every measure of the concerned staff. The option Each system displays it only at the beginning of a system. Another option lets you number only the measures multiple of a given number, 5 by default, which means to display the numbers on measures 5, 10, 15,...
A check box displays a rectangular frame around the measure numbers.
You can move the position of the measure numbers by clicking and dragging them vertically and horizontally. All numbers of the same staff move together. If you hold down the SHIFT key while dragging, all the score measure numbers move together. Move the drum staff number to the right so that it is no more on the bar line. Move slightly the piano staff numbers upwards. If you hold down the CTRL key while moving, only the clicked measure number will move.
If you check the Cancel individual displacements for one or more staves, the corresponding measure numbers will be moved back to their default positions.
Two other options of this dialog box are located in its lower part. They are global for all staves.
The first is labeled Instrument name position. A popup menu gives you 4 possible choices. The Manual choice lets you move each name horizontally as you want. The Right and Left choices justify the instrument names on one side and when you move one of them, the others follow the movement. The Center choice aligns the middle of the names and they also move together.
The second option is labeled First measure number and defines the offset number of the first measure so that you can start a score with measure 50 for example. It is useful when you encode several parts of a symphony in separate documents and you wish to keep the sequence of measure numbers. You can also place a negative number, for example -1. In this case, measures -1 and 0 will have no number and measure 1 will be in fact the third measure of the score.
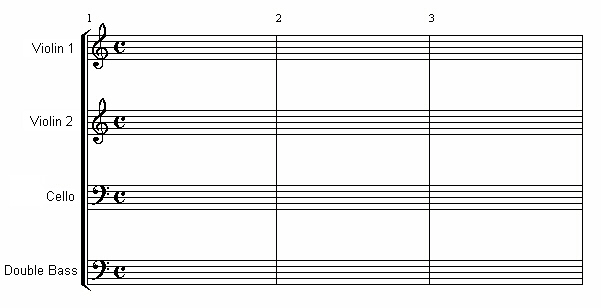
Exercise
As an exercise, realize the following score starting with the Ex049 document and adding the necessary measures and staves with the adequate tool.
Miscellaneous [Beginner] [Professional] [Notation] [Composition Light] [Composition Pro] [Drums and Percussion] [Guitar] [Choir] [Keyboard] [Soloist]
The following options are valid on a per staff basis and are located in the Various properties frame. They were designed for use with the guitar tablature, but some of them may be useful in other cases.
- The Stem directions menu may be Automatic in which case the stems are oriented as determined by the justification of measures. You can also set it to Force up or Force down. The stem direction of notes will be forced accordingly.
- You can hide the stems of the notes with the Hide stems check box.
- You can hide the beams (grouping of two or more notes) with the Hide beams check box.
- You can hide the time signatures of all measures of that staff by using the Hide time signature check box.
- You can ask Pizzicato to display the guitar chords diagrams below the chords symbols.
The Tablature frame is designed for the guitar only. See the lesson about the guitar tools
Lines, size and drums map [Professional] [Notation] [Composition Light] [Composition Pro] [Drums and Percussion]
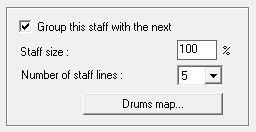
Some Pizzicato versions have one or two additional options in the staff characteristics dialog box:
The text box located to the right of the text label Staff size defines a ratio to increase or reduce the staff size. Call the staff characteristics dialog box and for the second staff select for example 50 %.
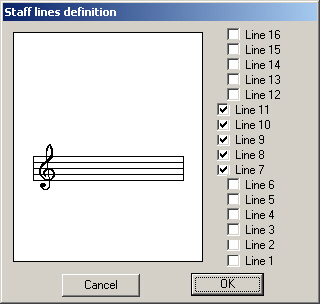
It is sometimes useful to modify the number and layout of staff lines, particularly for percussion instruments. Pizzicato offers a very powerful way to create a unconventional staff. For the drum staff, click the Number of staff lines popup menu. It lets you select the number of staff lines between 0 and 16 lines. They will be consecutive. In our case, we would like to realize a staff of 3 non consecutive lines. With that purpose, select the last item of this menu, labeled "***". The following dialog appears :
On the right, the check boxes represent the 16 possible lines of a staff. Only the checked lines will be displayed on the score, which lets you create very original and very practical staves for percussions. Uncheck lines 8 and 10. Click OK and you go back to the previous dialog. Click OK once again and the staves become:
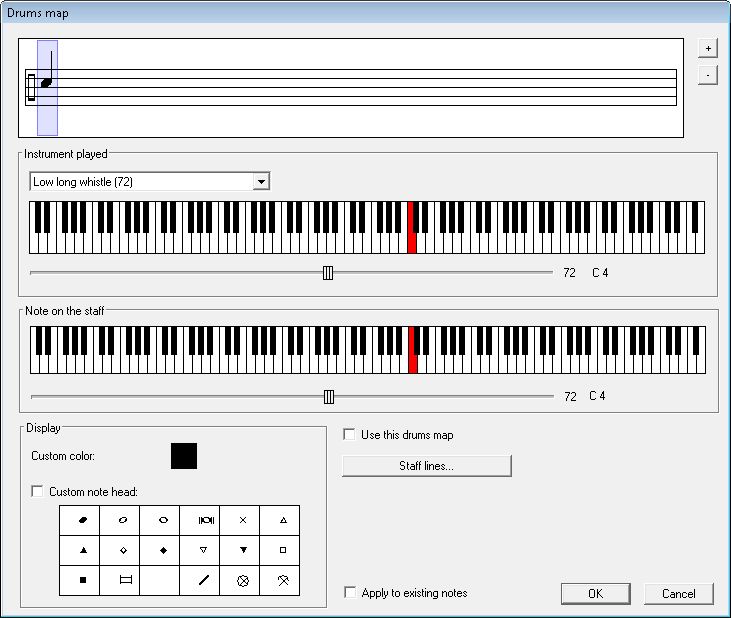
The Drums map... button calls a specific dialog box to assign percussion and drum instruments to the staff lines.
- Click on that button. By default, there is no instrument defined. Click on the "+" button to the right of the staff displayed. An instrument is added and you get:
- The upper staff displays the graphic aspect of the note and its position.
- The frame entitled Instrument played is used to select the sound that will be played by this instrument. You can select it through a popup menu with the list of General Midi drums, or by clicking on the keyboard (you hear the corresponding instrument) or also with a slider selecting the MIDI note pitch. This value does not affect the note position on the staff.
- The frame entitled Note on the staff is used to modify the graphic position of the note on the staff. You can select it through the keyboard or with the MIDI pitch slider.
- The frame entitled Display lets you assign a custom color and shape to that note. These will be used automatically when you enter the notes on that staff.
- The Use this drums map check box validates the use of the mapping on this staff.
- The Staff lines... button simply calls the dialog box to select the lines of the staff that are displayed, as already explained above.
- The Apply to existing notes... check box is used if you want Pizzicato to assign the colors and shapes of notes to the notes already present on that staff.
- The "+" and "-" buttons next to the staff are used to add/remove note definitions. The note of which the characteristics are displayed in the dialog is highlighted in blue. You can click on a note to display and edit its characteristics.
This dialog offers an intuitive way to create a custom drums map.
Notice that you can define several instruments with different note heads on the same staff line. When you enter a note on the staff, the first one will be used and you can use the sharp tool (or the "+" shortcut) to select the other instruments.
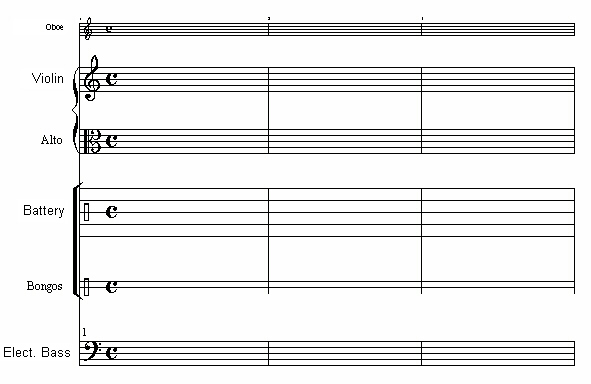
Exercise
As an exercise, realize the following score starting with the Ex049 document and adding the necessary measures and staves with the adequate tool.
Light |
Beginner |
Professional |
Notation |
Composition Light |
Composition Pro |
Drums and Percussion |
Guitar |
Choir |
Keyboard |
Soloist |