Light


Beginner
Professional
Notation
Composition Light
Composition Pro
Drums and Percussion
Guitar
Choir
Keyboard
Soloist
| Instruction manual - Pizzicato 3.6.2 | EN920 - Revision of 2013/05/29 |
Light |
Beginner |
Professional |
Notation |
Composition Light |
Composition Pro |
Drums and Percussion |
Guitar |
Choir |
Keyboard |
Soloist |
The audio editor
Subjects covered:
Accessing the audio editor [Light] [Beginner] [Professional] [Notation] [Composition Light] [Composition Pro] [Drums and Percussion] [Guitar] [Choir] [Keyboard] [Soloist]
The Pizzicato audio editor window is a tool used to modify an audio file. Once you have added an audio track to a score, you may then edit the audio track with the audio editor.
You may also open and edit an audio file that is independant of a score by using the Open an audio file... item of the File menu.
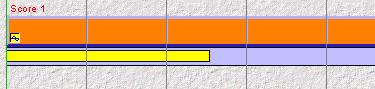
With the Pizzicato versions with only one audio track, you may open the audio editor through the Associated audio track... item of the Windows menu. A dialog appears and when you click OK (providing you have specified an audio file), the audio editor appears. With Pizzicato Professional and Composition, you must go in the conductor view (Windows menu, Conductor... item) and double-click on the audio track you want to edit. The audio tracks associated to a score may be shown by clicking on the little icon on the left bottom of the rectangle representing the score:
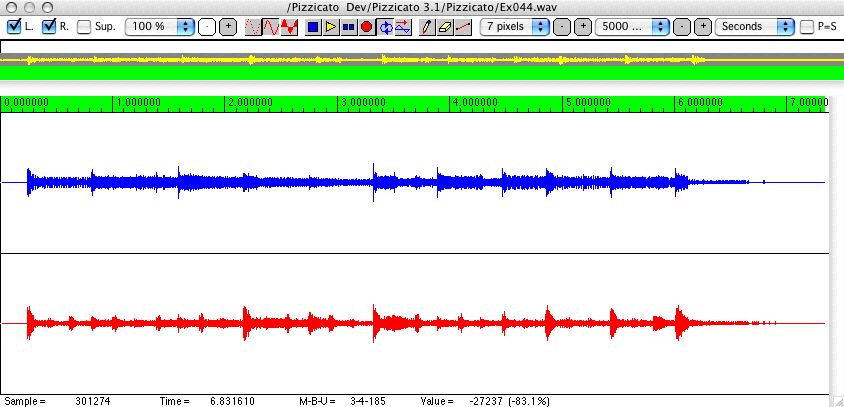
In both cases, the audio editor window appears:
If you do not have an audio wave file to use while exploring this window, we suggest that you create an audio file from one of your Pizzicato scores, as explained in the previous lesson. In this lesson we have taken the audio file generated from the Pizzicato example 44, as we did in the previous lesson. This lesson will explain all aspects of this window.
The various parts of the audio window [Light] [Beginner] [Professional] [Notation] [Composition Light] [Composition Pro] [Drums and Percussion] [Guitar] [Choir] [Keyboard] [Soloist]
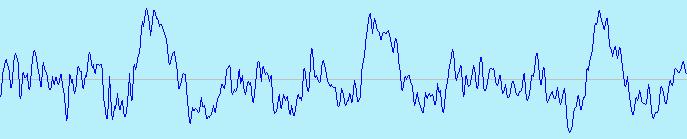
The central part displays the sound wave itself. In this example, the file is stereo, so there are two sound waves displayed. The upper wave (in blue) is the left channel and the lower wave (in red) is the right channel. Please note that the display and background colors you see on your screen may be different, according to the graphic options chosen, but this does not affect the functionalities of the window areas.
Just above the sound waves, there is a graphic area that displays the time scale. By default, the scale is expressed in seconds, with 6 digits after the comma to specify a precision of one microsecond. You may change this scale to display the number of samples or a reference to the measures and beats of the score, with the popup menu that appears in the right part of the toolbar:
When the window is opened, the full range of the wave is displayed. In this example the audio file has a duration of about 7 seconds in full CD quality (44100 samples per seconds) which means that there are about 300000 sample values displayed in one row. This is why the sound wave appears as a "thick block" and not as a nice curve moving up and down as we showed in the lesson on music notation.
The bottom part of the window shows information regarding the location over which you move the mouse inside the wave display area. The values displayed are respectively:
- Sample: this is the number of the sample. The first sample is sample number zero. Going from left to right, this number increases to show what sample the mouse is moving over.
- Time: this is the time value, in seconds with a precision of one microsecond, that corresponds to the moment when the sample is playing, relative to the beginning of the file.
- M-B-U: this means Measure-Beat-Unit. It may be used to see the related point in the associated score. This indication shows the measure number, the beat number of that measure and the fraction of the beat (480 units is one quarter note) that corresponds to the moment when this sample is playing.
- Value: is the value of the sample pointed to by the mouse in the wave area. It is always expressed as if the file was in 16 bits definition. If the file is in 8 bits definition, a conversion takes place automatically. It is expressed between -32768 and +32767 and also as a percentage value (-100 % to 100 %).
Above the horizontal scroll bar, there is an area that always shows the full audio file, in three colored bands:
The middle band shows a small representation of the sound wave. The yellow graph on a dark gray background shows what part of the file is visible in the main area of the window. When the window is first opened, this is the full file. Let us see how you may zoom into the file and display any part of it.
- Click in the middle of the central band. The above area becomes for instance:
A small gray line appears where you clicked, showing now in the main area the detailed graph of the sound wave, for instance:
- If you want to see some portion of the file in the main area, you may click, hold down the mouse and drag it on a specific range in that middle band. When you release the mouse button, the gray area is shown in the middle band and the main area displays the corresponding part of the file. You have for instance:
- You may also adjust the left and right border of that gray area. By clicking just on one border, you may adjust that border to enlarge or diminish that area.
- When the gray area does not cover the full range of the file, the horizontal scroll bar just below it lets you move that area left and right, so that you can display any part of the audio wave.
Specifying the file area to play [Light] [Beginner] [Professional] [Notation] [Composition Light] [Composition Pro] [Drums and Percussion] [Guitar] [Choir] [Keyboard] [Soloist]
The lower band of that area (in green) specifies what part of the file will be played when you click on the yellow triangle in the icons under the title bar. By default it is the full file.
- Click on the yellow triangle tool and you should now hear the file playing. The blue square icon just to the left is the stop button and the double blue square to the right is the pause button (clicking on the pause stops the playing, clicking again proceeds to play). The red circle button will be used later to record sound into the file.
- You may select the playing area by clicking in the green band, holding down the mouse, dragging it over the part of the file you want to hear and releasing the mouse button. Only that part is now displayed in green. If you click on the yellow triangle, you will hear just that part of the file:
Notice that the corresponding green area is also displayed in the scale area. You may use the same process as above to select the playing area in the scale area. In both cases, you may also extend the green area by clicking on one of its border and by dragging it. Another way is to click outside the green area while holding down the SHIFT key of the computer keyboard. The green area is then extended up to that location. This is also valid to extend the gray area.
- The
icon is used to play the green area in loop. When it is enabled (just click on it to enable or disable it), if you play the file with the yellow triangle, that part of the file will be played endlessly, each time going back to the beginning of that part, until you either stop it or disable the loop button.
- When you play a part of the file, you see a vertical line moving through this band, showing the position where that is played. This happens in the above area but also in the main area where the wave is displayed. As the main area does not necessarily show the full file, you only see the vertical line in the part of the file that is shown. If you want the main area to show at any time the place where the sound is playing, you may enable the
button, which forces Pizzicato to follow the playback graphically.
Selecting the working area [Light] [Beginner] [Professional] [Notation] [Composition Light] [Composition Pro] [Drums and Percussion] [Guitar] [Choir] [Keyboard] [Soloist]
When you want to modify the file, you must specify which part of the file you want to work on. This part is called the selection. Here is how to specify a selection in the file.
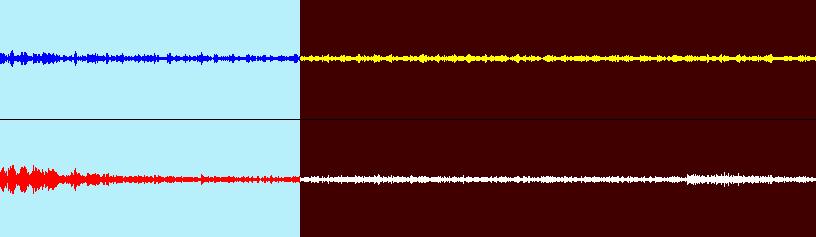
- In the upper area of the colored band (which is now blue), you may click, hold down the mouse button, drag over a part of the file and release the mouse button. The corresponding area becomes black. It is the selection:
The corresponding main area also becomes black, showing the part that is selected:
- You may select a part of the file directly in the main area, with the same process as above. You may in both cases move the edges of the selection or extend it by clicking outside the selected area while holding down the SHIFT key.
There is a check box to the right of the toolbar which, when checked, automatically sets the playing area (green) equivalent to the selection whenever you modify the selection:
P=S means Play equal Selection.
Modifying the selected area [Light] [Beginner] [Professional] [Notation] [Composition Light] [Composition Pro] [Drums and Percussion] [Guitar] [Choir] [Keyboard] [Soloist]
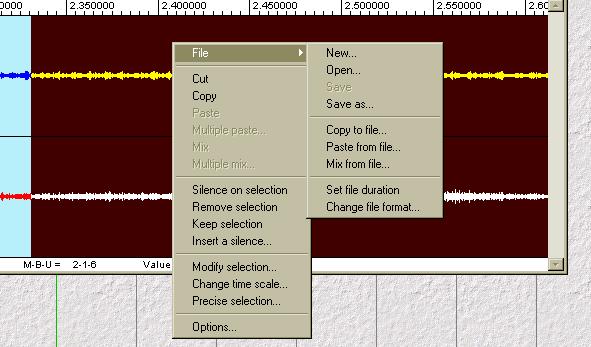
Once you have specified a selection, you may apply several modifications to that portion of the file. Most modifications are available through the use of a menu that appears when you click with the right mouse button on the main display area:
Here is a description of the various actions you can do with a selection.
- Cut - This is the standard operation that transfers the content of the selection in a temporary memory called the audio clipboard. The selection disappears from the audio file. This operation reduces the length of the file by the size of the selection.
- Copy - This is the standard operation that transfers the content of the selection in a temporary memory called the audio clipboard, but does not remove the selection. The audio file is not affected by this operation.
- Paste - The paste operation is only possible when the audio clipboard has some content in it, which is the case after a cut or copy operation. The content of the audio clipboard may come from the same file or from another audio window editor (Pizzicato Professional only). The content of the current selection of the audio file will be replaced by the content of the audio clipboard. Note that the audio clipboard content is left untouched.
- Multiple paste - Same as a paste, except that a dialog asks for the number of times you want to paste the clipboard into the file. If you answer "10", the content of the current selection will be replaced by ten times the content of the audio clipboard.
- Mix - The mix operation is only possible when the audio clipboard has some content in it, which is the case after a cut or copy operation. The content of the audio clipboard may come from the same file or from another audio window editor (Pizzicato Professional only). The content of the audio clipboard will be mixed with the current file, starting at the beginning of the current selection. This means that the original sound from the file is still there and has been mixed with the audio clipboard. Note that the audio clipboard content is left untouched.
- Multiple mix - Same as mix, except that a dialog asks for the number of times you want to mix the clipboard into the file. If you answer "10", the content of the audio clipboard will be mixed ten times with the current file, starting at the beginning of the current selection.
- Silence on selection - This operation clears the sound present in the selection. The duration of the file stays the same, but the sound present in the selection is replaced by silence.
- Remove selection - This operation removes the selection from the file. The file is then shortened. It is similar to the cut operation, except that the content of the selection is not copied into the audio clipboard.
- Keep selection - This operation does just that: the parts of the file before and after the selection are removed and the file consists then of the content of the original selection.
- Insert a silence - A dialog asks you to specify a duration, in milliseconds. If you click on OK, Pizzicato will insert a silence before the current selection. The selection is not removed. The file duration is increased by the amount of time you have added.
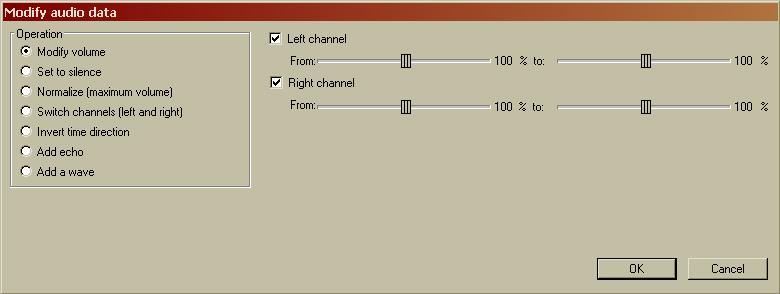
The left frame lets you select the operation you want to perform on the selection. According to the operation, there are other items that appear in the dialog, as we will see here. When you click on the OK button, the effect is applied to the selection. The file duration is not modified with those operations.
- Modify volume - The volume of the selection will be modified according to the sliders displayed to the right. You may affect both left and right channels or only one of them by using the appropriate checkboxes. The values of the two upper sliders specify respectively the volume level applied at the beginning and at the end of the selection, for the left channel. The lower sliders are for the right channel. For instance, if you want to create a fade out effect (the sound disappears progressively), you can put the first slider to 100 % and the second slider to 0 %.
- Set to silence - It is a short way of setting all volumes to zero, for either both channels or only one.
- Normalize (maximum volume) - This operation will first compute the maximum volume that may be applied to the selection, avoiding any saturation of sound. It will then apply that volume to the selection, for the channels you select. The result is that the selection will have its maximal possible volume without saturation.
- Switch channels (left and right) - This operation simply copies the left channel of the selection to the right channel and vice versa.
- Invert time direction - This is a special effect that inverts the time of the selection for the selected channels.
- Add echo - The following items appear in the dialog:
An echo of a sound is the same sound delayed and heard again with less amplitude. This happens for instance when you are in a large hall or under a large bridge or if you speak loudly in front of a distant wall or a mountain: you hear your voice back with some little delay. The delay is as long as the distance that separates you from the wall or mountain. It is the time needed for the sound to go from you to the wall and back to you again after the reflection against the wall. This operation may be added here to the content of the selection. You may specify the delay in milliseconds (1000 milliseconds is one second), the number of successive sound reflections as well as the amplitude applied to the successive reflections. A check box is provided to alternate the echoes on both sound channels, giving the impression that the sound bounds between left and right.
- Add a wave - The following items appear in the dialog:
This operation will add a simple note of music to the selection. The original content of the selection is still there, but a note has been added to it. The note duration will be the full size of the selection. The pitch (frequency) of the note may vary between two pitches expressed in Hz (Hertz means here sound vibrations per second). Those pitches may also be specified with the popup menus of the note names and octave numbers. Changing these popup values will compute the corresponding pitch in the text box above them. The timber (wave form) of the note may be selected between 6 simple wave forms: the sine wave (which is the purest timber available: it contains no other harmonic frequencies than the main one), the triangular wave, the saw tooth wave, the square wave, the pulse wave in 25% and 10% (which is the length of the sound pulse inside a sound cycle). Each one gives a particular sound sensation that you should try for yourself. A more technical parameter is the phase of the added sound which may vary between 0 (no delay) and 360° (a full cycle of the wave). The volume sliders also apply so that you may vary the starting and ending amplitude of the note for both channels.
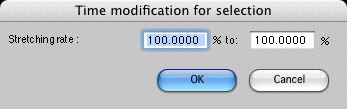
With this operation, the selection will be stretched in time. The file duration will then be modified. The stretching factor may vary from a starting to an ending value. A value greater than 100 % will extend the duration of the sound, while also lowering its frequencies. A value less than 100 % will shorten the sound while also increasing its frequencies. Applying this effect to a voice will for instance make it quite different. This may be used to create special effects, for instance a piece of music playing on an old phonograph and your finger pushing on it to slow it down. Or the effect of rewinding a record very fast. Just try it for yourself.
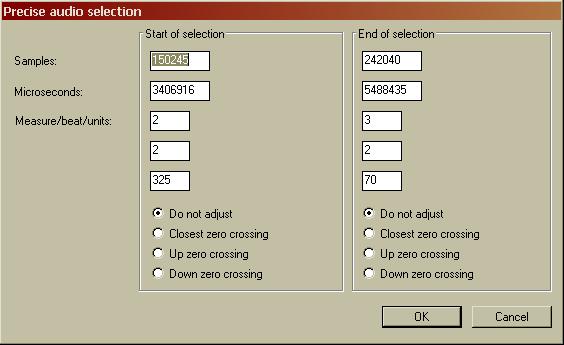
This operation does not affect the sound but merely helps you to adjust an existing selection precisely. For instance, if you want to concatenate two audio parts, you may select the first as explained before and copy it to another place. But if you want a precise result, without a 'click' sound in the transition between the two audio parts, you should specify the selection very accurately, so that the wave goes smoothly from one audio part to the other. This is mainly done by being sure that the last sample value of the first audio part is quite similar than the first sample value of the second audio part. Otherwise there will be a discontinuity that will result in a 'click' effect.
With this dialog, you have the possibility to adjust the starting and ending points of the selection:
- By specifying the number of the sample
- By specifying the time position, in microseconds (1000000 microseconds is one second)
- By specifying the measure, the beat and the fraction of the beat (one quarter note is 480 units) in relation to the score.
Moreover, you may ask Pizzicato to adjust that selection:
- To the closest zero crossing point (that means where the wave crosses the central line of the wave diagram you see on the screen, where the air particle is in its central position)
- To the closest up zero crossing point (the wave crosses zero from below the central line to above the central line)
- To the closest down zero crossing point (the wave crosses zero from above the central line to below the central line)
This is useful if you work with sound waves that you want to multiply for instance to make a note sound longer without touching its frequency. You may select a part of the wave and then apply the up zero crossing adjustment so that the selection is ready to be pasted a lot of times in sequence without any discontinuities.
Zooming [Light] [Beginner] [Professional] [Notation] [Composition Light] [Composition Pro] [Drums and Percussion] [Guitar] [Choir] [Keyboard] [Soloist]
Here are some ways to better determine which part of the file you want to see.
When you specify the gray area as explained above, the length of that area determines the zoom that is used to display the audio information in the main area. You may also directly determine the zoom values, with the following toolbar items:
The first popup menu tells how much pixels will represent how much samples of the second popup menu. Remember that a pixel is the smallest graphical area that can be displayed on a computer screen. In the above case, there will be 5000 samples displayed on a screen width of 7 pixels.
You may select other values in the popup menus or use the "-" and "+" buttons to go step by step. Try some values and see how it looks like on the screen.
When you click in the gray area without dragging, the zoom value is automatically set to 1/1, which means one sample per graphic pixel.
Another zoom is available in the left part of the toolbar:
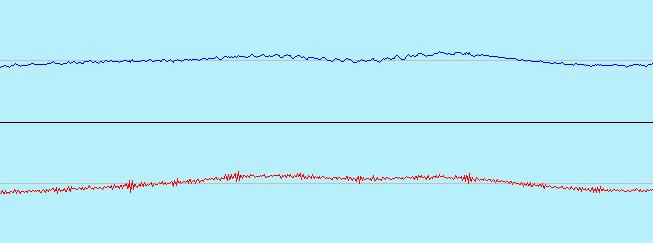
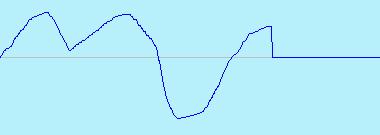
This value may be increased up to 6400 % and lets you increase the vertical scale of sample representation. For instance, at 100 % you may see a soft sound like this:
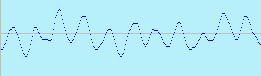
Zooming to 1000 %, the wave will be displayed with more details:
When using a vertical zoom, the full range of the samples will be higher than the vertical size of the panel that displays the wave. To move up or down, use the vertical scrollbar to the right of the window.
At any time, by holding down the CTRL key, you may click and drag inside the wave display area and the mouse cursor takes the form of a hand and lets you move the wave left and right (and also up and down if the vertical zoom is greater than 100). This is an easy way to move in the wave slowly, so as to examine it.
File operations [Light] [Beginner] [Professional] [Notation] [Composition Light] [Composition Pro] [Drums and Percussion] [Guitar] [Choir] [Keyboard] [Soloist]
When using the contextual menu of the wave display area (right-click or Alt-click on Mac), a menu is displayed with the operation that may be applied to files:
Here is what you can do with this menu.
- New... - Creates a new audio file. A first dialog asks you to specify the name and the location of the file. Another dialog appears:
You may select the audio quality that will be used in that file. Then another dialog appears:
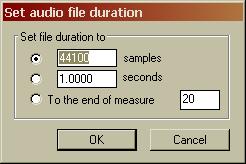
You may specify the duration of the file, either in samples, in seconds or to reach the end of a measure number of the current score. When you validate, the audio window displays the new file.
Note that this file is a new one. The previous audio file displayed was associated to the current score and stays associated with it, but this new file has not been automatically added to the score. If you want that file to play with the score, you must explicitly associate it to the score, as explained in the lesson about audio tracks.
- Open... - This loads an existing audio file into the audio editor. The above remark is also valid: the opened file is not automatically associated to the score.
- Save - Save the changes to the file on disk. Unless you do that (or answer yes to the dialog asking to save the file when you close the window), the modifications you perform on the audio file are temporary. With a save, they become permanent.
- Save as... - Save the file with another name. The original file still exists and stays associated with the score. The new file is not automatically associated with the score.
- Copy to file... - To use this menu, there must be a selection present. This operation copies the selection into a new file. Pizzicato asks you to specify the name and the location of the file.
- Paste from file... - This operation will replace the current selection by the content of another audio file. Pizzicato asks you to select an existing audio file that will be pasted in the selection.
- Mix from file... - This operation will mix the current file (starting at the beginning of the current selection) with the content of another audio file. Pizzicato asks you to select an existing audio file.
- Set file duration... - This operation is used to modify the exact duration of the current file. Pizzicato asks you to specify the file duration:
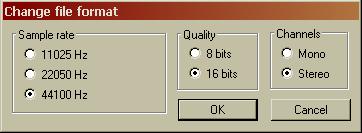
- Change file format... - This operation is used to modify the format of the audio file. Pizzicato warns you that the file will also be saved with that operation. Then Pizzicato asks you to specify the new format (quality) of the file:
Recording an audio file [Light] [Beginner] [Professional] [Notation] [Composition Light] [Composition Pro] [Drums and Percussion] [Guitar] [Choir] [Keyboard] [Soloist]
We have seen in a previous lesson how to create an audio wave file from any Pizzicato score. You may also record a new audio sequence and insert it into the existing file. You must first specify a selection and then the
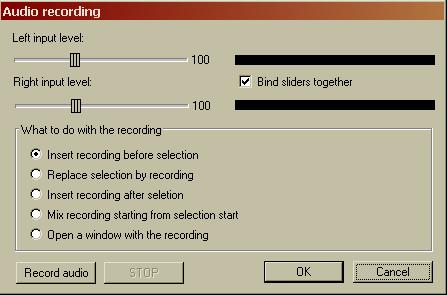
icon is used to open the audio real time recording dialog. When you click this icon, you get the following dialog:
- The two sliders let you specify the recording level. The bar graphs should now display any sound that is coming from the selected source of sound.
The sound source used for the recording is not selected in Pizzicato but in the Windows record volume control panel or in the Mac Sound panel in the System Preferences. To know how to select a source, see the lesson on exporting a score into a wave file. If you want to record your voice or an acoustic instrument through a microphone, you should then select the microphone and connect your microphone to the computer sound card.
- You may start recording by clicking the Record audio button. To stop it, use the STOP button. You may do that many times if you want. The last recording will be the one you can use.
Notice that the score with which the original sound file is associated will be played while recording. This is useful for instance if you want to sing on a musical accompaniment that you made in the score. In that case, you should use a headphone to hear the music and sing in the microphone, so that the microphone does not also record the music you hear (which is useless because the music is already in the score and it would create a bad interference). The same principle is valid if you record an acoustic instrument.
- Once you are done with the recording, the lower part of the dialog lets you specify what you want to do with that record. You may:
- Insert the recording before the selection
- Replace the selection by the recording (the previous selection is then removed)
- Insert the recording after the selection
- Mix the recording with the content of the file, starting at the beginning of the selection
- Open a new audio window with the recording. In that case, you may modify the recording (for instance remove some parts or silence,...) and then you may use the copy/paste function to include it in the file you are working on.
Once you have selected the operation you want to do, click on OK and Pizzicato executes the action.
Modifying the wave directly [Light] [Beginner] [Professional] [Notation] [Composition Light] [Composition Pro] [Drums and Percussion] [Guitar] [Choir] [Keyboard] [Soloist]
You may modify the wave directly with the three following tools, available in the toolbar:
- To use these tools, the sample zoom value must be equal to 1. You may use any pixel zoom value (from 1 to 16).
- Go to the beginning of the audio file and click on the first tool above. This is the drawing pen. You may now draw directly into the wave display area with the mouse to modify the wave:
With this tool, you may correct any irregularity you find in an audio file (a "scratch" from an old phonograph record,...).
- The next tool just sets any sample you touch to zero.
- The last tool helps you to draw lines, for instance:
- To disable a tool, just click on it again and it becomes inactive.
Miscellaneous options of the editor [Light] [Beginner] [Professional] [Notation] [Composition Light] [Composition Pro] [Drums and Percussion] [Guitar] [Choir] [Keyboard] [Soloist]
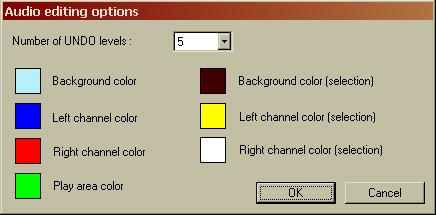
You can open the option dialog with the contextual menu when you right click (alt-click on Mac) in the main wave display area. Select the Options... item and the following dialog appears:
You may select the number of undoable operations, between 2 and 15. You may also customize the various colors used when displaying the waves.
In the left part of the toolbar, you will find the following items:
- The L and R checkbox lets you respectively display the left and right channels.
- The Sup. checkbox, when checked, will display the left and right channel superposed. You can then more easily compare both channels.
- The next three items have been described above: they are used to change the vertical zoom.
- The next three icons represent three ways of displaying the wave form, respectively:
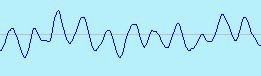
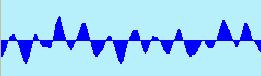
- Each sample is displayed as one dot:
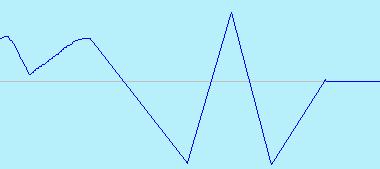
- The samples are connected together with a line:
- The samples are displayed with a full vertical line starting from the central position:
Note that to see the difference, the display zoom must be less or equal to 5 samples per pixels.
Light |
Beginner |
Professional |
Notation |
Composition Light |
Composition Pro |
Drums and Percussion |
Guitar |
Choir |
Keyboard |
Soloist |